Setup
There are three steps for setting up the Analytic Bridge plugin.
- Create a Google Developer project
- Connect the Analytic Bridge to Google's APIs
- Connecting a Google Analytics Profile
Networks only need to complete step 1 and 2 once. Each blog on the network must complete step 3.
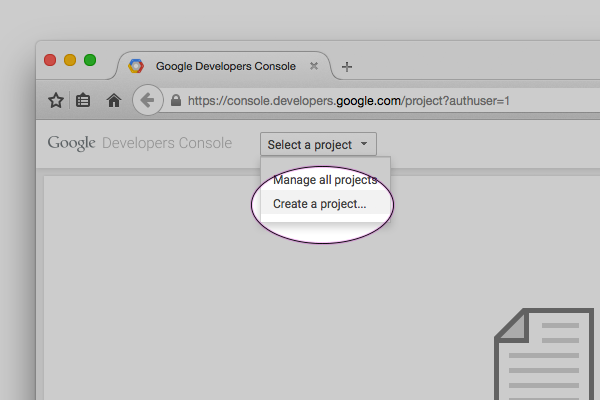
1. Create a Google Developer project
To allow Google to monitor usage on its API, every call must be authenticated with a Client Secret and Client ID. No special account is necessary for this.
Log into console.developers.google.com/ and create a new project for the plugin. Name the project something like "Analytic Bridge."
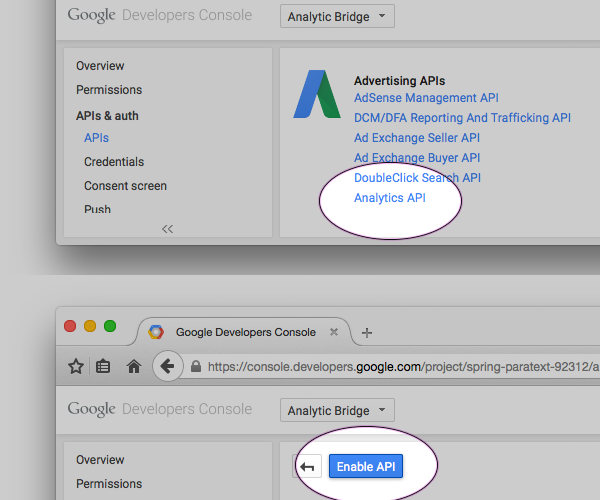
Under APIs & auth, click "APIs". Find the Analytics API and enable it.
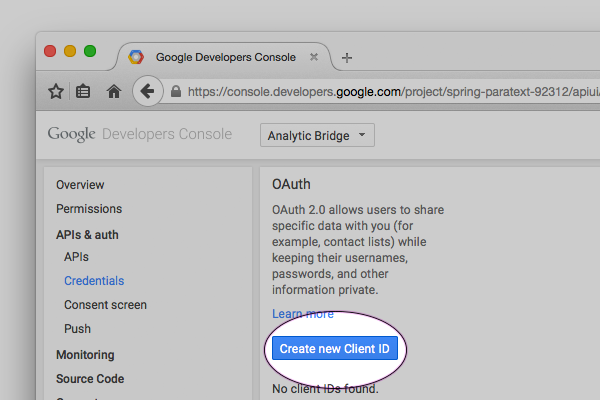
Under APIs & auth, click "Credentials." From here click "Create new Client ID."
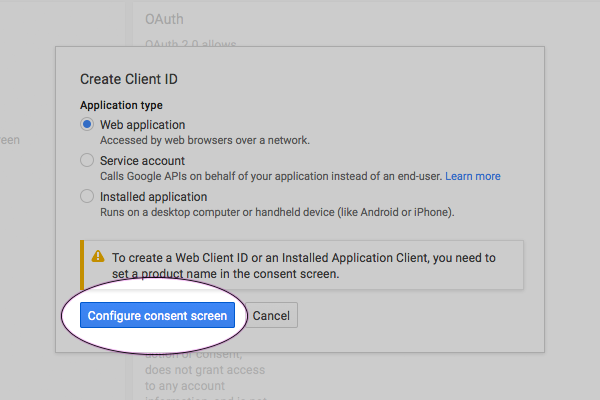
Use "Web application" for the Application type, and click "Configure Consent Screen".
Enter a product name and other optional pieces of the consent screen. No need for advanced configuration — only one user will ever authenticate the app per site.
When you're done, save consent screen options.
On the next screen, enter an "Authorized redirect URIs" in the format:
http://your-domain.com/wp-admin/options-general.php?page=analytic-bridge
If you're installing the Analytic Bridge on a network of sites, every subdomain and custom URL on the network must be defined on additional lines.
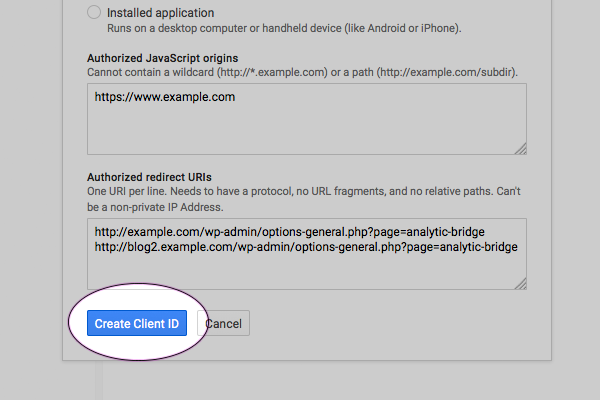
Google should provide a Client ID and Client Secret on the next screen. Save these around for the next step.
2. Connect the Analytic Bridge to Google's API
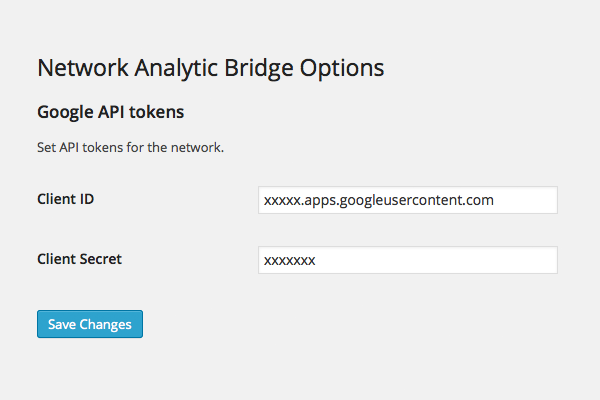
Depending on whether your blog is a network or single site, input the Client Secret and Client ID on the appropriate options page.
For Networks: If you are the Site Administor of a network, paste the values from step one into the Network Options page for the Analytic Bridge.
or:
For Single Sites: If you do not have a WordPress network install (or are not an administor of your network), enter the values from step one on the options page for the Analytic Bridge (Settings > Analytic Bridge).
3. Connecting a Google Profile
-
Find the profile id that corresponds to the Google Analytics table tracking your site, and save it in Property View ID. This should be in the format
ga:xxxxxxx -
Assuming steps one and two are valid a "connect" link should become available at the bottom of the page. Use this button to authorize a Google account with permissions to the Property View you are attempting to pull data from.